Document your #powerbi model with #chatGPT and a #tabulareditor script and browse it in your model

Inspired by Darrens Gosbell’s excellent blog post – Automatically generating measure descriptions for Power BI and Analysis Services with ChatGPT and Tabular Editor – Random Procrastination (gosbell.com) – and my session at SQLBits 2023 where I showed how to call the chatGPT from within Power Query and how you can use the New chat (openai.com) – to describe your M code.

I thought it would be nice if I could add this as a description to my tables in Power BI model.

How hard can that be 🙂

Well, it turns out that we are not allowed to modify the table object via the Tabular #ditor and this includes adding a description to the table

So, if I created a script that added a description – it worked fine but returning to the desktop I was asked to refresh the queries and the descriptions where removed by Power BI desktop –

Well, what is supported as write operations to a model?

Calculation groups is supported – hmmm… could I use this and then actually create a calculation group with a calculation item for each of the tables in my model – that would also mean that I could create a table in my report and expose the descriptions in a report page instead of the description should be hidden away on the tooltip of a table in the field list – This could actually be quite awesome!

C# Script here we go

I know very little about how to write C# code so Darrens example and the documentation of Tabular editor was a big help and please bear in mind that I am a C# novice when reading my code

The steps needed to this is as follows (I have used Tabular Editor 3 but it should be possible to us the free version of Tabular Editor as well

Step 1 – Open your Power BI desktop file and find the external tool ribbon and click the Tabular Editor

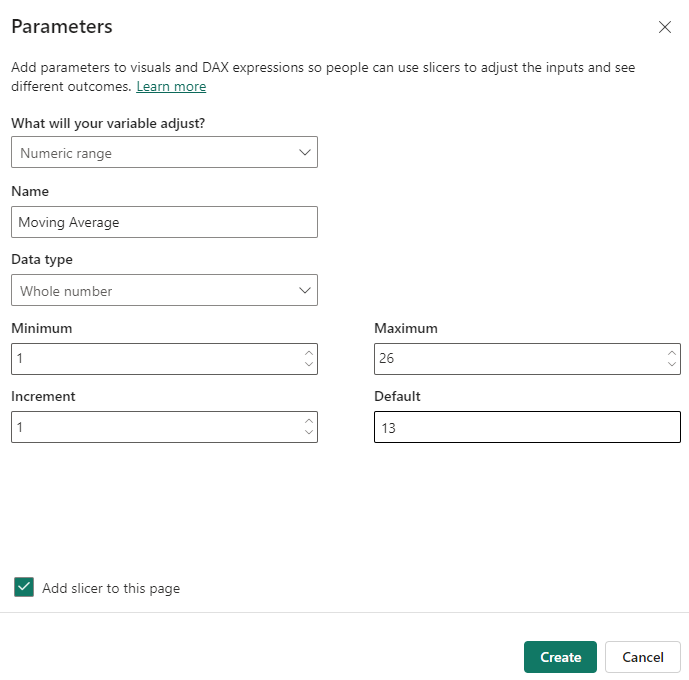
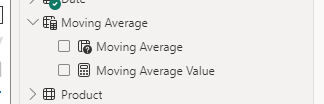
Step 2 – Add a Calculation Group called “Documentation”

Step 3 – Choose to create a New C# Script

Step 3 – Use the following script and run it

#r "System.Net.Http"
using System.Net.Http;
using System.Text;
using Newtonsoft.Json.Linq;

// You need to signin to https://platform.openai.com/ and create an API key for your profile then paste that key 
// into the apiKey constant below
const string apiKey = "<YOUR_API_KEY>";
const string uri = "https://api.openai.com/v1/completions";
const string question = "Please describe this power query code for me:\n\n";

using (var client = new HttpClient()) {
    client.DefaultRequestHeaders.Clear();
    client.DefaultRequestHeaders.Add("Authorization", "Bearer " + apiKey);

    foreach (var t in Model.Tables)
    {
        
        foreach ( var p in t.Partitions)
        {
            // Only uncomment the following when running from the command line or the script will 
            // show a popup after each measure
            //
            //var body = new requestBody() { prompt = question + m.Expression   };
                string _type = Convert.ToString(p.SourceType);
                string _exp = Convert.ToString(p.Expression);
        if ( _type == "M" )
            {var body = 
                "{ \"prompt\": " + JsonConvert.SerializeObject( question + p.Expression ) + 
                ",\"model\": \"text-davinci-003\" " +
                ",\"temperature\": 1 " +
                ",\"max_tokens\": 256 " +
                ",\"stop\": \".\" }";

            var res = client.PostAsync(uri, new StringContent(body, Encoding.UTF8,"application/json"));
            //res.Result.EnsureSuccessStatusCode();
            var result = res.Result.Content.ReadAsStringAsync().Result;
            var obj = JObject.Parse(result);
            var desc = obj["choices"][0]["text"].ToString().Trim(); 
          
            //Reference to your calculation group that should hold the calculation Items
            var x =(Model.Tables["Documentation"] as CalculationGroupTable).CalculationItems[t.Name];
            
            //deletes the old version
            x.Delete();

            var calculationItem1 = (Model.Tables["Documentation"] as CalculationGroupTable).AddCalculationItem();
            
            //removes any quotes in the chatGPT description
            var s = desc.Replace("\"", "");

            calculationItem1.Expression = "\"" +  s + "\"";
            calculationItem1.Name = t.Name;
            
            //Info("Processing " + t.Name) ;
            
            }
        }

    }
}

This will create a calculation item for each of your Power Query table and add a Expression that contains the chatGPT description of your M code

Example of one of the tables

Step 4 – Save the changes back to your model and you will be prompted to refresh your calculation group

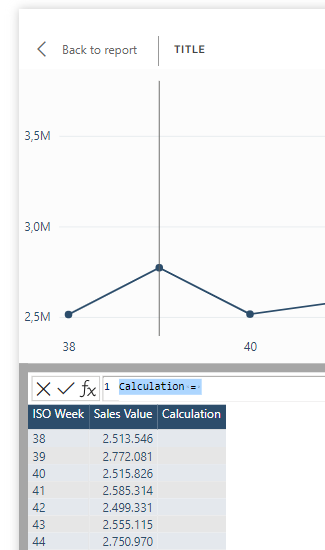
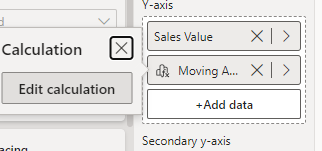
Step 5 – Add a table where you take the Calculation group name and a measure that I call Query description – the value of this measure will in the table be changed to the expression of the calculation item.

https://tenor.com/embed.js

We could use the same method to document our DAX measures and put that into a calculation group as well – thereby documenting our full model and exposing the information directly in the report and not just in the tooltips of the fields.

I will try to find time to do a blog post on this as well.

Let me know in the comments if you find this useful – would very much like to hear from you.

Using Field Parameters when connecting to a #PowerBI dataset or Azure Analysis Services

The new preview feature “Field parameters” in Power BI desktop has opened a lot of creativity in the Power BI community.

But if you use a connection to a Power BI dataset or Azure Analysis Services – the Parameters button will be greyed out

And if you don’t have the permission to change the model you won’t be able to use the feature.

So how can we use the Field parameter filter to make field selection or measure selection dynamically?

Well – we can use another preview feature to enable this

If you have turned “DirectQuery for PBI datasets and AS” on – you will get the option make changes to this model

Clicking this will change your connection to a direct query source instead of a live connection.

When we click add a local model – we can choose the tables and measures we want to include

And our storage mode will change to “DirectQuery”

But another thing changes as well – the New parameter – Fields will be enabled on the modelling tab

And then we can start building our Field paramaters

In this case for selecting what to appear on the X-axis and another one for selecting Measures / values

And then we can make our visuals dynamic by using our field parameters in the X-axis and Y-axis in the visual

When publishing the report, it will mean that the workspace will get an extra dataset

But don’t worry the linage is visible and as it is a direct query there is no need for setting up datarefresh

If you connect a new report to the dataset you will also get the field parameters in the new report as the information is stored in the direct query dataset.

Hope you find this useful and if you do – give this post a like please

How to try/test another #PowerBI theme on your existing reports in the service

I am a big fan of using themes in Power BI but the current theme designer in Power BI desktop is very limited and doesn’t support all the things you really can do with themes.

So I use the excellent theme designer tool from powerbi.tips – https://themes.powerbi.tips/themes/palette

And I use the paid version so I can save my themes that I use for different clients.

The tool also has the excellent option of showing demo visuals to get a feeling of how it will look.

But I want to see how my new theme might look on some old report where I might have used another theme or perhaps some reports other users have created where they have done some individual formatting instead of using the theme.

And did you know – we can do it and see the result for existing report in your workspaces – and we can directly modify the theme and see if we should change a color or a font size or a….

Here is how

The Microsoft Power BI Embedded playground – Power BI Playground – gives us the option to try the developer sandbox

When you sign in to the playground with your credentials and click “Select Report” under use my own Power BI report

You will then be able to select an existing report in your Power BI tenant that you want to work with.

This will open the report in the playground and give us the opportunity to play around with the different report APIs that is available.

In this case I opened a report that I want to try and change the theme on.

Under the Layout group there is an item called “Set report theme”.

If you drag that into the code area

A code snippet with a custom theme will be added.

This is short theme file you see from row 95 to 101.

And when you click on Run

You will be able to see the awesome look of the new theme

This quickly reveals that the current theme file contains some drastic changes and we can start playing around with other color by changing the code.

Here the primary color is changed to a dark gray.

As you noticed the theme only has about 6 lines and very few settings so why not try the theme I have created in Theme generator from PowerBi.tips – so I download the file to my desktop and open it in

visual studio code.

And then I copy all the text from the editor and replace the existing theme

With the new theme code – be careful when you replace the text – you should have a ; (semicolon) at the end

Now let’s see how it looks.

And as you can see, I still need to do some work in the theme file to make it look pretty

This hopefully gives you an idea of how you can test your theme file directly on existing reports without having to download the pbix and import theme file and revert back and forth.

During my playing around with the theme generator and the playground I have come up with a few ideas that I will provide to the guys at PowerBI.tips and I am sure that they are interested in feedback from you as well on how they can improve their tool.

#PowerBI – Adding a vertical bar to your slicer

Yesterday I worked on a Power BI report where the client wanted to add vertical bar next to the slicer in order to make the design of the slicers a little bit nicer and also to make the slicers recognizable cross pages by using the same coloring.

My first choice was to use a shape and group it together with the slicer

But there is an easier way.

Use the Shadow properties of the slicer.

If you choose the Custom Position

You set the

Size to 0 px

Blur to 0 px

Angle to 180 (if you want the bar to the right of the slicer you can specify 0)

Distance 10 px (determines the width of the bar)

Transparency 0 px

These settings will set the slicer to look like this

And you avoid having shapes and grouping on your page

If you change the slicer to a tile or vertical list the bar will also be there

Hope you find this useful.

#PowerQuery – Create a date column from Year number and a month name

Sometimes it’s the little things that can help you minimize the number of steps in your Power Queries.

Here is another example that might help you.

Let’s imagine your data contains two columns with year and the month name and you want to create a date column.

Start by selecting both columns and under the Add Column tab select Merge Columns

Specify the separator as a space and give your column a name (to avoid a rename column step )

This will result in a step

Now modify the step to

And then in one step you have a date column – as I have a Danish format in the format is DD-MM-YYYY.

Happy Querying

#PowerAutomate – Get a copy of an invoice from your E-conomic system

In my company we use e-conomic as our ERP system and it is also used to send invoices to our customers.

Now our commercial managers do not have access to e-conomic but they do need the information about what is invoiced to our customers.

We have build our own CRM system using a Model driven Power App where each commercial manager has access to his accounts.

So how can I give the account manager access to a specific invoice for a specific customer ?

Power Automate and the e-conomic api comes to the rescue.

First of all you need to sign up for a developer account at e-conomic – Developer (e-conomic.com) – this will give you the opportunity to build an app in e-conomic that you can install in your e-conomic ERP app.

There is a fine description on how to do this here – Connecting to the APIs using tokens (e-conomic.com)

When the app is installed you will get an AppSecretToken and a Granttoken – the App secret is generated when you install the app and the Granttoken is visible in the list columen “Adgangs-ID”

Set up the flow

  1. Go to https://make.powerautomate.com/
  2. Pick the right environment
  3. And choose create
  4. Then I picked “Instant cloud flow

    But you could pick another type of trigger from one of the other connectors – perhaps react to an e-mail with the invoice number as a subject or ???

  5. Name your flow and choose the trigger
    and click create
  6. And in order to retrieve a single invoice I add an Input field
  7. Click the Next step button and search for the HTTP connector

    and choose the HTTP action

  8. Choose the GET method and for the URI – you specify – https://restapi.e-conomic.com/invoices/booked/

    and then select Invoice number from the dynamic content list of fields

    and after the Invoice number you add – /pdf – !!!

  9. In order to authenticate the Http request against the e-conomic API – we have to add some headersThe headers has to be X-AppSecretToken and X-AgreementGrantToken

    and you have to use the information from your App registration to get these.

  10. The http request will return a pdf document that then should be saved somewhere – when search for “create file” you can see a lot of possible places to save it

    In this example I will save the file to a OneDrive for Business folder

    So I choose a folder and name the file with the dynamic content of the invoice number and use the Body returned by the Http step as the content of the file that should be created.

  11. Next up – lets save the flow and test it

    so I enter a invoice number I know and hit run

    And success

Final words

In our case we have enhanced the process a bit more and transfer the invoices to an Azure blob storage on a daily schedule plus we have integrated our model driven app with Power BI reporting. So the customer form contains a tab with a Power BI report filtered by the customer with access to all the invoices and KPI’s for the customer.

Hope this give you some inspiration as well.

#PowerBI Convert all Power BI links in Power Point to images

Yesterday I posted an image of some PowerPoint VBA code on LinkedIn and Twitter and a lot of people have asked for a copy of the code.

So I have made a Power Point file with the code included and a small instruction on how to use it.

The code has been changed compared to the posted image as it ran to fast for Power Point – so I added a pause in the code to wait 1 second for each conversion.

The Code

Sub ConvertAllPBIToImages()
Dim x As Slide
Dim shp As Shape

Dim sShapes As Shapes

'Loop through all the slides
For Each x In ActivePresentation.Slides

    x.Select
    'Loop through all the shapes on the slide
    For Each shp In x.Shapes

        'Is it a Power BI App - Report
        If shp.Title = "Microsoft Power BI" Then

            'Inserted to make sure as the code sometimes runs
            'a bit to fast for Power Point
            WAIT = Timer
            While Timer < WAIT + 2
               DoEvents  'do nothing
            Wend

            shp.Copy

            Set sShapes = x.Shapes

            x.Shapes.PasteSpecial ppPasteBitmap

            shp.Delete

        End If
    Next
Next

End Sub

Here is a link to a file with the code.

LINK

Hope you find it useful.

#PowerQuery – Convert a referenced query column to a table without Table.FromList() – Magic trick

This week I watched the video from Guy in A cube with Patrick and Alex Powers – You thought DAX? Alex shows you Dynamic M-M-Magic! – YouTube.

And one trick I noticed Alex used was something I didn’t know about Power Query and had annoyed me for a long time.

As you might have seen in my previous posts I like to make the queries as short as possible – and this tip will help me do that even better than my previous tip – How to avoid a rename step in #PowerQuery when you use Table.FromList – #PowerBI – Erik Svensen – Blog about Power BI, Power Apps, Power Query (wordpress.com)

Let’s imagine I have a query with a column called Reportid – and I want to create another query with the unique values from the column.

Normally I would create a new blank query and than reference the column with – queryName[ColumnName]

And then we have a new query that contains a list.

I want a table, so I use the “To Table” in the ribbon or the shortcut menu

Click Ok in the dialog

And a new step is added and I end up with a table

THE TRICK –

Instead use double square brackets and you will not only get a table, but the column name is also as I want it. – Query[[ColumnName]]

That is awesome – hope you find it useful too

Happy Querying!!!

#PowerQuery – Add Year, Month and Day to your date table with Date.ToRecord – #PowerBI

When you build a date table in Power Query you might use the functions under Date to add year, month and day

And this will give you three steps in your Query

But we can do this a bit faster, and you will save a few clicks with your mouse

If you add a custom column using this formula

= Table.AddColumn(#”Changed Type”, “Custom”, each Date.ToRecord([Date]))

You will get a column containing a record

Then next step is to expand the record

And Voila – Year, month and day in 2 steps instead of 3.

Update – 25/10-2021

If you want to specify the datatype for each of the Year, Month and Day you can modify the formula for addColumn to

= Table.AddColumn(#”Changed Type”, “Custom”, each Date.ToRecord([Column1])
, type [ Year = number, Month = number, Day = number]
)

This will make the columns numbers

Happy Querying

How to avoid a rename step in #PowerQuery when you use Table.FromList – #PowerBI

Here is a tip that reduces your Power Query steps with 1 step less.

When I build date tables I typically use the function List.Dates to create a list of dates.

As I want it as a table I use the Ribbon interface to convert the list of dates into a table

Which then gives med a table with on column called Column1

Instead of renaming the column using the interface like this

And thereby getting an extra step “Renamed Columns”

You should modify the third argument in the Table.FromList and specify the name of the column in a list

= Table.FromList(Source, Splitter.SplitByNothing(), {“Date”}, null, ExtraValues.Error)

Which will reduce the number of steps with 1.